Table of Contents
ToggleLiving room flooring sets the tone for the entire space, it’s the foundation that grounds your design, handles foot traffic daily, and either works with or against your décor. Tile has become a go-to choice for modern living rooms, offering durability, easy maintenance, and endless design possibilities that wood and carpet simply can’t match. Whether someone is renovating a dated floor or building a new space from scratch, tile delivers style without compromise. This guide covers eight contemporary tile ideas and practical installation considerations to help you choose and install the right option for your home.
Key Takeaways
- Living room tile ideas offer unmatched durability, easy maintenance, and design flexibility compared to carpet or hardwood, with porcelain options lasting decades while resisting scratches, stains, and temperature changes.
- Large format tiles (24″ × 48″ or larger) create a sleek, contemporary look that makes spaces feel larger and reduces visual clutter from grout lines, though they require precise substrate preparation and professional installation.
- Warm earth tones like terracotta, taupe, and cream provide timeless appeal that complements any décor, while matte or textured finishes hide dust and offer better slip resistance than polished surfaces.
- Bold geometric patterns, zellige, and mosaic-style tiles work best as accent features or statement walls rather than full floors to avoid visual fatigue while adding personality to modern living rooms.
- Mixing different tile sizes, finishes, and materials using a 60-20-10 formula (dominant, secondary, and accent tiles) creates sophisticated visual interest when executed with careful planning and professional installation.
- Proper substrate preparation, back-buttering large tiles, and sealing grout lines within 48–72 hours are critical installation steps that prevent costly mistakes and ensure your tile floor withstands daily foot traffic and moisture for decades.
Why Choose Tile for Your Living Room Floors
Tile stands out in living rooms because it performs. Unlike carpet, it doesn’t trap dust or pet hair: unlike traditional hardwood, it doesn’t scratch, dent, or require refinishing every few years. A quality glazed ceramic or porcelain tile in a high-traffic space will outlast most other flooring by decades with minimal intervention.
Tile also adapts to underfloor heating, which matters if you’re considering radiant heating, something you can’t easily retrofit into wood or laminate. The thermal properties make living rooms feel cozier in winter without cranking up the thermostat. On the practical side, spills wipe up instantly, and grout lines can be sealed to resist staining. Porcelain tile, which is denser than ceramic, handles temperature swings and moisture better, making it the smarter choice for living areas.
Design flexibility is another big win. Tile comes in virtually any color, pattern, finish, and size. You get modern minimalism, rustic warmth, geometric boldness, or subtle elegance, all in one material. The upfront cost is higher than some alternatives, but the lifespan and low maintenance recoup that investment quickly.
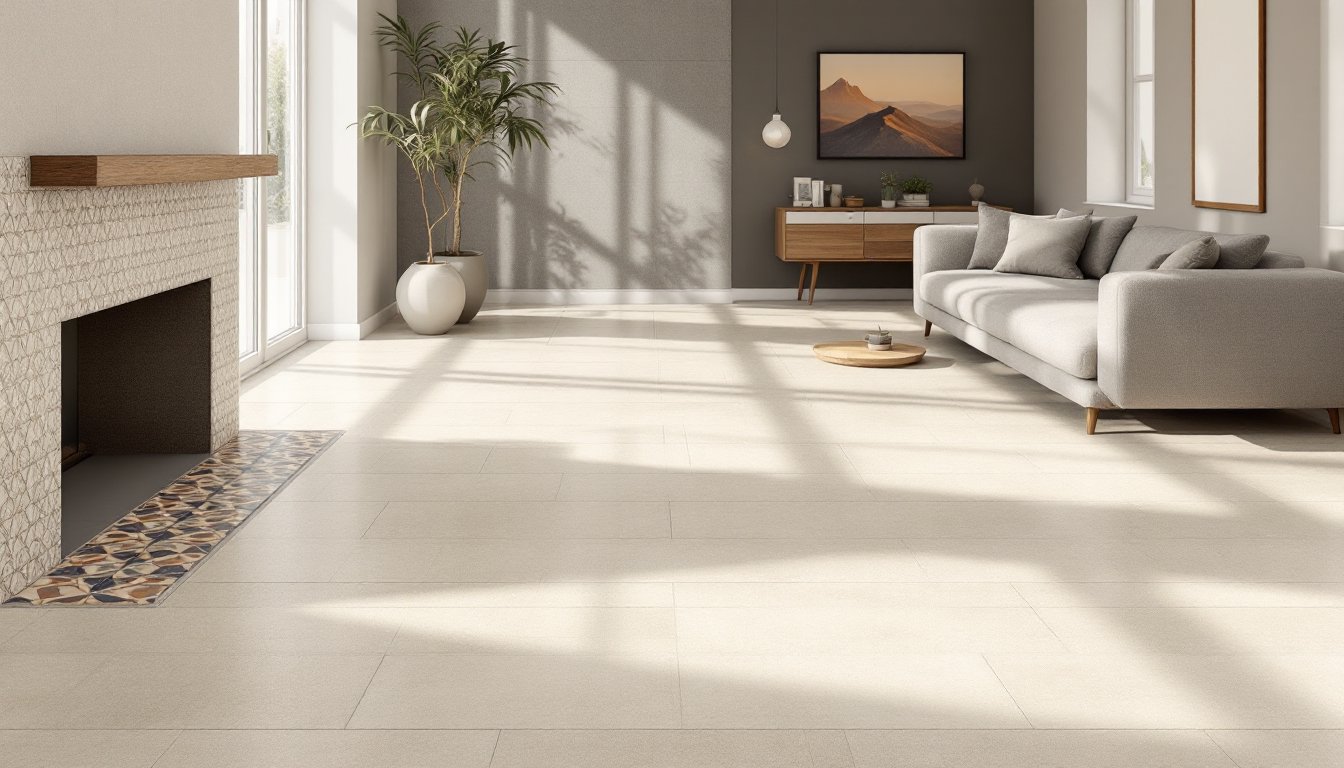
Large Format Tiles: The Contemporary Choice
Large format tiles, typically 24″ × 48″ or 36″ × 36″, dominate contemporary design. They make rooms feel larger, reduce the visual clutter of grout lines, and create a sleek, uninterrupted flow that small tiles can’t achieve. These tiles work especially well in open-plan living spaces where you want continuity from entry to seating area.
The main trade-off is precision. Larger tiles require flatter substrate preparation: any lippage (unevenness between adjacent tiles) becomes obvious. You’ll need a quality leveling system and spacers to keep joints consistent. Installation is slower and often worth hiring a pro, especially for full living room coverage.
Portugese and Italian manufacturers lead here with durable porcelain options that mimic natural stone, concrete, or marble without the fragility. Finishes range from glossy to matte to textured, depending on the look you’re after. A matte large format porcelain tile resists footprints and glare better than a polished version, practical in a room where people lounge for hours. Budget $8–$15 per square foot for mid-range large format tile, plus another $5–$10 for professional installation.
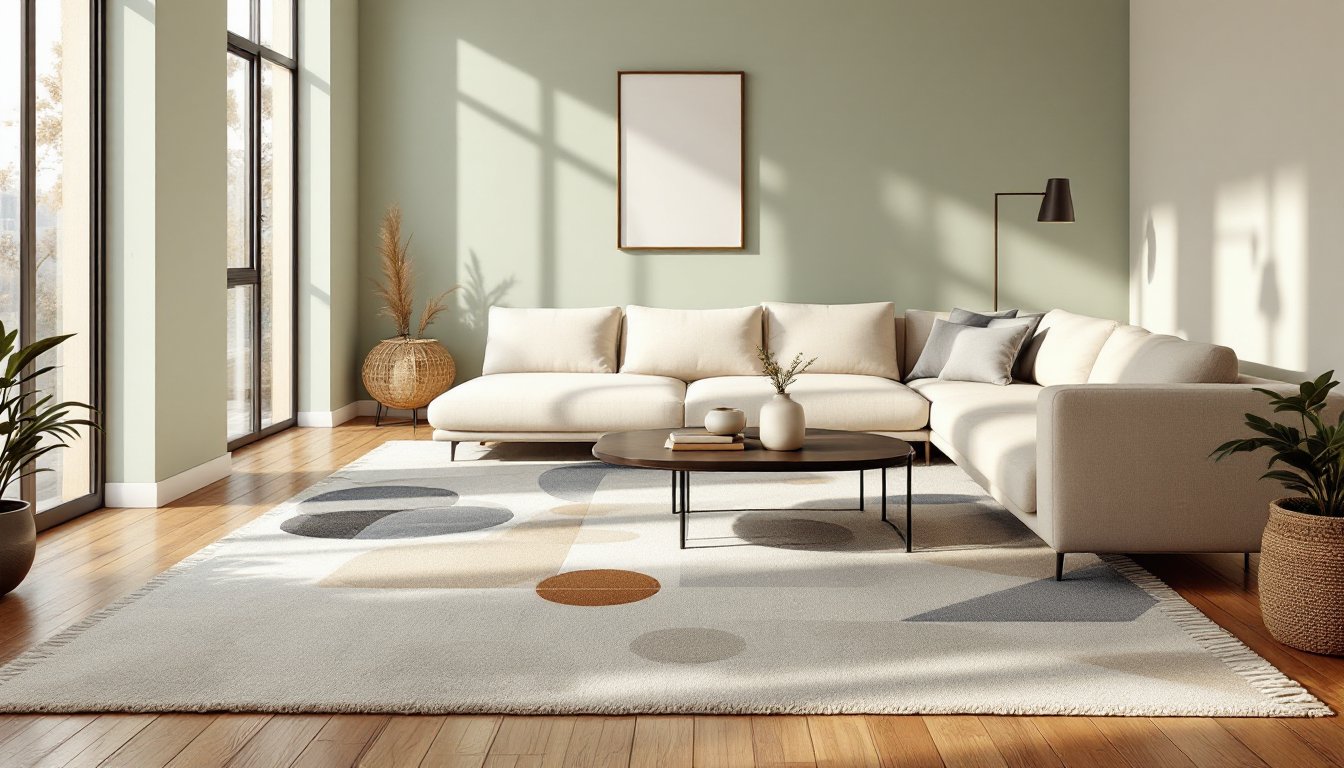
Warm Earth Tones and Natural Finishes
Warm neutrals, terracotta, sand, taupe, cream, and soft ochre, remain timeless because they complement any furniture and lighting. These tones create calm, inviting living rooms without feeling cold or sterile. Natural finishes matter here: a matte or satin surface mimics real stone better than glossy tile and hides dust between cleanings.
Terracotta-inspired tiles often feature slight color variation from tile to tile, which adds authenticity but requires careful batch selection during purchase. Specify that you want tiles from the same production run to minimize inconsistency. For a warmer aesthetic, look for tiles with a textured surface, not slippery underfoot and more forgiving than a polished glaze.
Naturally toned porcelain tiles that imitate limestone, slate, or aged wood offer similar warmth with superior durability and less maintenance than actual stone. These tiles resist etching (damage from acidic spills) better than natural stone and won’t require periodic sealing. Pair them with a neutral grout, matching the tile color keeps sight lines clean, or contrast with a darker grout for definition.
Bold Patterns and Geometric Designs
If your living room calls for personality, geometric and patterned tiles deliver impact without overwhelming. Zellige (hand-cut Moroccan tile), terrazzo, and custom geometric prints are having a moment, especially in accent walls or feature areas. A full floor in intricate patterns risks visual fatigue, so reserve bold designs for a statement zone, a fireplace wall, an entry nook, or a half-wall behind a sofa.
Mosaic-style tiles (smaller tiles arranged in repeating patterns) create rhythm without the monotony of single-color floors. They work well in mid-century or bohemian living rooms. Geometric designs, chevrons, hexagons, or modern abstract patterns, suit contemporary and industrial aesthetics. Check the slip rating on patterned tiles: some finishes (especially matte or textured) are safer underfoot than others.
Mixed-size tiles (say, combining 12″ × 24″ with 6″ × 12″) in complementary colors create dynamic layouts that feel intentional rather than accidental. Installation is more complex because each size and pattern requires planning, so expect a pro install and higher labor costs. Plan the layout on graph paper first to avoid waste and ensure patterns align properly.
Mixing Tile Types for Visual Interest
Blending different tile types, size, finish, color, in one floor creates sophistication without chaos. A popular approach pairs large format tiles with smaller accent tiles, or mixes matte and subtle gloss finishes for tactile depth. Done carefully, this strategy elevates a room: done haphazardly, it looks scattered.
The safest formula: select a dominant tile (60–70% of the floor), then introduce a secondary tile in a complementary color or smaller size for accents (20–30%), and a third element sparingly (10%) for visual surprise. Stick to two to three colors maximum to avoid the space feeling busy.
Combining Textures and Materials
Portugal and Spain produce stunning mixed-material collections that pair ceramic, porcelain, and stone-look tiles in cohesive palettes. Rough slate-finish tiles next to smooth, polished ones create visual interest while maintaining a unified color story. Concrete-look tiles pair well with wood-look tiles in industrial or farmhouse settings, the contrast feels intentional rather than mismatched.
When mixing materials, consider maintenance differences. Unglazed tiles absorb more dirt and stain easier: polished stone etches. Decide whether you’ll seal grout and, if needed, whether all tile types can tolerate the same sealer without discoloration. Professional installation is nearly non-negotiable with mixed designs, misaligned or poorly grouted mixed-tile floors look amateur.
Installation Tips for a Professional Finish
Success starts with substrate prep. Existing hardwood must be underlaid with cement backer board (1/2″ thick minimum) to prevent flex and cracking. Concrete subfloors need a moisture barrier and leveling compound if they’re uneven. Lippage tolerance for most installations is 3/16″ over 10 feet, anything more looks sloppy.
Use the right adhesive: modified thin-set mortar (not mastic, which dries too quickly and bonds poorly) for most interior tiles. Spread it with a notched trowel matching the tile size, 3/8″ notch for small tiles, 1/2″ or larger for big format. Back-butter large tiles (apply mortar to the tile back too) to ensure full coverage and avoid hollow spots.
Grouting matters as much as tile placement. Unsanded grout works for joints under 1/8″ wide: sanded grout for wider joints provides better crack resistance. Grout shrinks slightly, so avoid undersized joints, a 1/8″ joint is minimum for most applications. Epoxy grout costs more but resists staining and moisture far better than cement grout: it’s worth considering in living rooms near kitchens or bathrooms.
Wear safety goggles, dust masks (tiles and grout dust contain silica), and work gloves throughout. Seal grout lines after 48–72 hours of curing with a penetrating sealer to resist water and stains. This small step extends grout life significantly. If you’re laying anything larger than 12″ × 12″ or working with mixed sizes, hire a licensed tile installer, mistakes here are expensive to fix.